- Winterizing Outboard Motor—Yamaha Essential Maintenance
Winterizing Outboard Motor—Yamaha Essential Maintenance
August 11, 2025
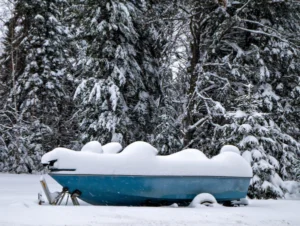
It’s that time of year again, and unfortunately, it’s time to store your boat for the season. While it’s always a bit more fun to pull out your boat than to put it away, properly winterizing your Yamaha outboard engine avoids engine damage and will facilitate a smooth start to the beginning of next season.
Winterizing a boat with an outboard motor ensures protection from freezing damage and corrosion during the off-season.
TL;DR: To winterize your Yamaha outboard motor, flush the engine, stabilize the fuel, fog the cylinders, change spark plugs and lower unit oil, and disconnect the battery. These steps help protect against corrosion, fuel system issues, and freezing damage—whether you’re storing a 2-stroke or 4-stroke motor.
Shop Featured Products for Winterizing Your Yamaha Outboard
Wondering how to winterize your Yamaha outboard motor? While there are several things you can do before storing your boat to get a jump on next season—like changing your oil, changing your Yamaha fuel-water separating filter, and maybe touching up some scratches on your cowling cover—there are six highly recommended steps.
- Thoroughly flush your engine
- Stabilize your fuel system
- Fog your outboard engine
- Change your spark plugs
- Change lower unit oil
- Disconnect your battery
These apply whether you’re winterizing a 2-cycle outboard motor or a Yamaha 4-stroke.
Flush Your Engine
You’ll need:
- Motor flusher
- Garden hose
- Water supply
It’s important to thoroughly flush your engine to remove any salt buildup if you are a saltwater boater, or general mud and grime if you are a freshwater boater. Failure to remove this debris can cause or contribute to corrosion in the engine. If you’re a saltwater boater, salt crystals in the lower unit can cause a great deal of damage.
If your outboard has a hose adapter, simply screw the hose into the port, turn on the water and let the water run for about 5 minutes.
Next, remove the cowling cover and look for any salt or grime build-up that may have settled outside any engine components. If you spot any build-up, simply rinse it away.
Finally, tilt the engine all the way up, then trim it all of the way down to make sure every drop of water drains from the engine.
**Caution**
Do not run the engine when flushing while using a hose port. This method is solely designed for flushing while your engine is entirely off.
Flushing Your Outboard with the Engine Running
To flush your Yamaha outboard with the engine running, you will use a motor flusher (also known as earmuffs). Screw your garden hose onto the motor flusher, then slide the motor flusher over the engine’s water intakes. You must be sure that the earmuffs are completely covering the water intakes. Using this flushing method, you will turn on the engine. But first, make sure that you have a good water supply and that water is coming out on both sides of the earmuffs.
Start the engine and make sure that water is flowing from the tell tale. Assure that your engine is not overheating by holding your hand under the tell tale water stream. It should not be uncomfortable to hold your hand in the stream of water. If the water is excessively hot, water is not flowing correctly, and you are overheating your engine—turn off the engine, reposition the earmuffs, and start again.